Your heart hammers in your chest. One second, your dog was chasing a ball in the yard; the next, a sharp yelp cuts through the air. You see blood. Panic sets in. What do you do? Knowing the first steps of dog wound care in this moment is crucial.
I’ve been there, and that feeling of helplessness is awful. But here’s the good news: with the right knowledge, you can handle this. You can be your dog’s hero in this moment. This guide is your calm in the storm. We’re going to walk through everything, step by step. First, we’ll figure out if you need a vet right now. Next, we’ll explain the essentials of proper dog wound care safely and effectively at home. This includes cleaning, bandaging, and choosing the best products available, right down to which tube of ointment to have ready. You’ll leave here feeling prepared and confident.
The Most Important First Step: When to Call the Vet, Immediately
Before you do anything else, you need to make one critical decision: can this be handled at home, or is this a true emergency? Acting quickly can make all the difference. If you see any of the following “red flag” symptoms, stop what you’re doing and call your veterinarian or a local emergency animal hospital right away.
“Red Flag” Checklist: Go to the Vet Now If You See…
- Heavy Bleeding: You’ve applied firm, direct pressure with a clean cloth for 3-5 minutes, but the bleeding hasn’t slowed down or stopped. This is a sign that the injury is more serious than it appears.
- Deep Wounds or Lacerations: The cut is gaping open, or you can see underlying tissues like fat (which looks yellowish and bumpy) or muscle. These wounds need professional cleaning and likely stitches to heal properly.
- Puncture Wounds: These are incredibly deceptive. A bite, a sharp stick, or a nail can create a small hole in the surface but drive bacteria deep into the tissue. This is a perfect setup for a painful abscess, especially for wounds on the chest or abdomen, which could involve vital organs.
- Any Bite Wound: It doesn’t matter if it was a big dog or a small cat. Animal mouths are teeming with bacteria, and even a minor-looking bite can lead to a major infection. All bite wounds require a vet’s evaluation.
- Burns: All burns, whether from heat, chemicals, or electricity, need to be seen by a professional. The surface damage often doesn’t show the full extent of the injury to deeper tissues.
- Embedded Objects: If you see glass, metal, or a large piece of wood stuck in the wound, do not try to pull it out. You could cause more damage or severe bleeding. Let a vet handle it safely.
- Signs of Infection: The wound area is very red, hot to the touch, swollen, has a bad smell, or is oozing yellow or green pus. These are classic signs that a bacterial infection has already taken hold.
- Eye Injuries: Any wound on or near the eye is an absolute emergency. Don’t take any chances with your dog’s vision.
- Extreme Pain or Lameness: If your dog yelps in pain, can’t move a limb, or seems very upset, seek medical help right away.
If your dog’s wound doesn’t meet any of these criteria, you can likely manage it at home. Now, let’s get you prepared.
Your At-Home Arsenal: Building the Ultimate Dog First-Aid Kit
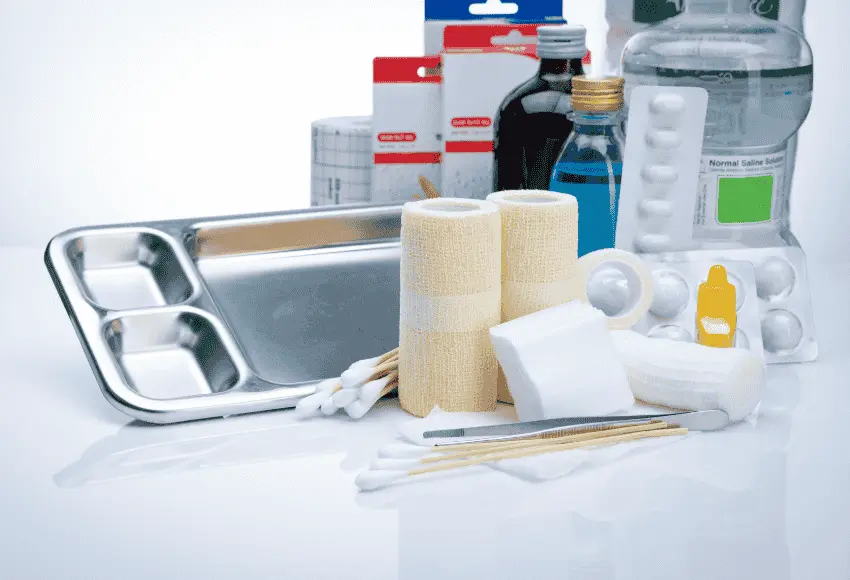
Being prepared for dog wound care turns panic into purpose. You don’t need a full ambulance in your closet, but having a few key items on hand is a game-changer. We can break it down into two levels: a small kit for on-the-go and a more complete kit for your home.
The Grab-and-Go Kit (For the Car or Backpack)
This is your small, portable kit for hikes, park visits, or road trips.
- Self-Adhesive Bandage (Vet Wrap): This is a colorful, stretchy wrap that sticks to itself but not to fur. It’s perfect for quickly covering a wound or applying pressure.
- Sterile Gauze Pads: A few 4×4-inch pads are essential for cleaning wounds and stopping bleeding.
- Antiseptic Wipes: Individually wrapped wipes are perfect for cleaning a minor scrape when you don’t have access to water.
- Tweezers: For removing small splinters or thorns.
- A Small Roll of Medical Tape: For securing gauze if you don’t have vet wrap.
- Your Vet’s Phone Number: Saved in your phone and written on a card inside the kit. Include the number for the nearest 24/7 emergency vet, too.
The Full Home Kit (The Cabinet Arsenal)
This is your comprehensive station for at-home care. It includes everything from the grab-and-go kit, plus:
- Digital Thermometer: To check for fever (a normal dog temperature is around 101 to 102.5 degrees Fahrenheit).
- Blunt-End Scissors: For safely cutting bandages or trimming fur away from a wound.
- Pet-Safe Antiseptic Solution: Use diluted Chlorhexidine or Povidone-Iodine to flush wounds. Vets recommend it.
- Saline Solution: A gentle, sterile solution for rinsing eyes or flushing debris from wounds.
- Styptic Powder: An absolute must-have if you trim your dog’s nails. It stops bleeding instantly if you accidentally clip the quick.
- A Cone (E-Collar) or Alternative: This is non-negotiable for preventing licking. Make sure you have one that fits your dog before you need it.
- A Selection of Wound Care Products: It’s smart to have a few options. We’ll explore these later. For now, a good liquid bandage, a gentle wound spray, and a tube of Silver Honey will cover most needs for your dog.
Minor Dog Wound Care: Your 5-Step At-Home Protocol
Okay, you’ve assessed the wound, and it’s not a red-flag emergency. You’ve gathered your supplies. Now it’s time to act. Following these steps will ensure you’re providing safe and effective dog wound care.
Step 1: Stay Calm & Secure Your Dog
This is the most important step. Your dog will feed off your energy, so take a deep breath and speak in a calm, reassuring voice. An injured dog is a scared dog, and a scared dog is more likely to struggle or even bite.
If you can, grab a helper. One person can gently hold and soothe your dog with pets and quiet praise while the other person tends to the wound. For everyone’s safety, use a muzzle. Even the sweetest, most gentle dog on earth can snap when in pain. Using a muzzle isn’t cruel; it’s a responsible way to keep everyone safe so you can focus on helping.
Step 2: Gently Clean the Wound
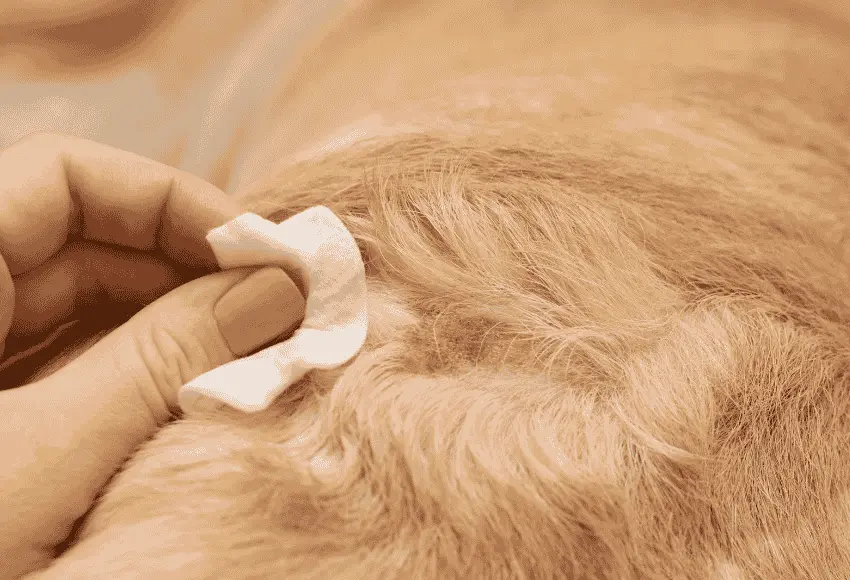
First, if there’s a lot of fur around the wound, you’ll want to carefully trim it away with blunt-nosed scissors. Hair is a magnet for bacteria and can get trapped in the wound, preventing it from healing properly.
Next, gently flush the area. The best and safest options are warm tap water or a sterile saline solution. You can make your own saline by mixing one level teaspoon of salt into two cups of warm water. If you have it, a diluted pet-safe antiseptic like chlorhexidine is also excellent.
What to AVOID: This is critical. Do not use hydrogen peroxide or rubbing alcohol. For decades, we were told these were the go-to cleaners, but we now know they are too harsh. They kill the healthy new cells that are trying to heal the wound, which can actually delay healing and cause more pain. Stick to water, saline, or a vet-approved antiseptic.
Step 3: Apply a Pet-Safe Topical Treatment
Once the wound is clean and you’ve gently patted the surrounding area dry with a clean cloth or gauze, it’s time to apply a healing agent. A thin layer of a pet-safe product can help prevent infection and soothe the skin.
Here are some good options:
- A pet-specific triple-antibiotic ointment
- A quality wound spray for dogs
- A healing ointment, such as Silver Honey
While many people reach for Neosporin, some dogs can have an allergic reaction to it, so a product made for animals is always a safer bet.
Step 4: To Bandage or Not to Bandage?
Not every wound needs a bandage. For minor scrapes or abrasions in a clean area (like on your dog’s side), leaving it open to the air can be the best way for it to heal.
However, you should apply a bandage if:
- The wound is on a paw or another area that will easily get dirty.
- The wound is weeping or oozing slightly.
- You can’t stop your dog from licking it (even with a cone).
Step 5: Prevent Licking!
This might just be the biggest battle you’ll face in dog wound care. A dog’s instinct is to lick its wounds, but the old myth that their saliva is healing is just that—a myth. A dog’s mouth contains a ton of bacteria that can turn a clean wound into a nasty infection in no time. We have a whole section on this challenge coming up, but for now, just know that an E-collar (the “cone”) is your best friend.

The Art of the Dog Bandage: Paws and Legs
Bandaging is a critical skill in dog wound care. A poorly applied bandage can be more dangerous than no bandage at all, but a good one provides protection and promotes healing. The biggest risk is wrapping it too tightly, which can cut off circulation and cause serious damage. By following a few golden rules, you can do it safely.
The Three Golden Rules of Safe Bandaging
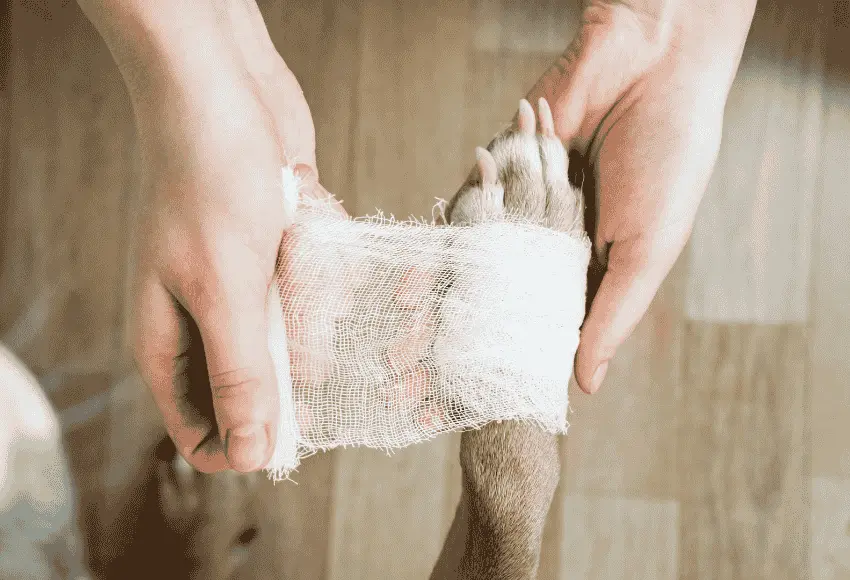
- Always Include the Foot: When you’re bandaging a leg, you must always wrap all the way down to and including the foot. If you stop at the ankle, blood and fluid can pool in the paw, causing painful and dangerous swelling.
- Check the Tension (The Two-Finger Rule): After applying the bandage, you should fit two fingers under the top edge easily. If you can’t, it’s too tight. Take it off and start over.
- Leave Toes Exposed (Your Warning System): Whenever possible, leave the tips of the two middle toes sticking out of the bottom of the bandage. These toes are your built-in safety gauge. Check them a few times a day. If they look swollen, feel cold to the touch, or are spreading apart, the bandage is too tight and needs to be removed immediately.
How to Bandage a Dog’s Paw (Step-by-Step)
- Clean and Prep: After cleaning the wound, place a non-stick gauze pad directly over it. To prevent rubbing and moisture, place small tufts of cotton or pieces of gauze between each of your dog’s toes.
- Padding Layer: Start wrapping with a layer of soft, rolled padding (like rolled cotton). Begin at the toes and wrap up toward the ankle in a spiral, overlapping each layer by about 50%. This layer provides a cushion.
- Securing Layer: Now, do the same thing with a roll of conforming gauze. This layer holds the padding in place.
- Protective Layer: Finish with a layer of self-adhesive vet wrap. Remember not to stretch it as you apply it, as it will constrict after being wrapped. Unroll a piece first, then apply it with gentle, even pressure. Start at the toes and work your way up, leaving the tips of the two middle toes exposed.
How to Bandage a Dog’s Leg (Step-by-Step)
The process is very similar, but you’re covering a larger area.
- Apply the Pad: Place your non-stick gauze pad over the clean wound.
- Wrap the Layers: Just like with the paw, apply your three layers: first the padding, then the conforming gauze, and finally the vet wrap.
- Start at the Paw: Always begin your wrapping at the bottom (the paw) and work your way up the leg to a point above the wound. This pushes blood flow back toward the body instead of trapping it in the lower leg.
- Check Your Work: Use the two-finger rule at the top and check those exposed toes at the bottom to ensure the bandage is secure but not too tight.
Your OTC Product Guide: Liquid Bandages, Sprays, and Silver Honey
Walking down the pet aisle or browsing online can be overwhelming. Dozens of products all claim to be the best for dog wound care. Let’s break down the most common types so you know what you’re actually buying.
Liquid Bandage for Dogs: A Modern Fix for Minor Scrapes
A liquid bandage for dogs is a spray-on or brush-on polymer that creates a thin, waterproof, and breathable seal over a minor wound.
Best For:
- Small, clean scrapes that have stopped bleeding
- Minor cuts from running through the brush
- Protecting a nail that was clipped a bit too short
It’s great for awkward spots where a traditional bandage won’t stay put.
When NOT to Use: Never use a liquid bandage on a deep wound, a puncture wound, a bite wound, or any wound that looks infected. The entire purpose of this product is to seal the surface. If you seal harmful bacteria inside the wound, you’re creating a perfect environment for a serious infection or abscess to form. Also, be very careful to avoid using it near the eyes.
How to Apply: Make sure the area is clean and dry. Spray a light, even coat over the wound, and hold your dog still for 30 to 60 seconds to allow it to dry completely.
Wound Spray for Dogs: Decoding the Ingredients
Not all sprays are the same. The effectiveness and safety depend entirely on the active ingredient. Here are the ones you’ll see most often:
- Hypochlorous Acid (HOCl): This is the active ingredient in popular products like Vetericyn. It’s a fantastic choice because it’s a powerful antimicrobial that is incredibly gentle. It cleans wounds effectively without stinging or damaging healthy tissue, and it’s completely safe if your dog licks it. This is one of my top recommendations for an all-purpose wound cleanser.
- Chlorhexidine: This is another vet-trusted, broad-spectrum antiseptic that kills both bacteria and fungi. It’s excellent for cleaning wounds and treating skin infections like hot spots. It is very safe, but using it often may slow the healing of a fresh surgical incision. So, it’s better for injuries and general skin cleaning.
- Benzalkonium Chloride: You will find this ingredient in some over-the-counter sprays. It is an antiseptic, but some research and veterinary sources suggest it can be irritating to tissue and may delay healing. I recommend using safer and more modern options, like Hypochlorous Acid, instead.
The Buzz About Silver Honey for Dogs
You’ve probably seen Silver Honey for dogs popping up everywhere, and for good reason. This is more than a gimmick. It combines two strong, natural healing agents: medical-grade Manuka Honey and MicroSilver BG™.
The Science: This is where it gets cool. Manuka Honey is special because it has strong antibacterial properties. It also keeps a moist environment, which is great for healing. In fact, a 2024 study published in The American Journal of Veterinary Research reports that medical-grade honey is more effective against dog wound germs than other types of honey. MicroSilver has large particles that sit on the skin’s surface. This creates a long-lasting antimicrobial shield. It does not get absorbed into the body.
The Benefits: This combination is proven to kill 99.9% of bacteria immediately, which jump-starts the healing process. It soothes irritation, helps soften and remove stubborn, old scabs, and is safe for a huge range of issues, from hot spots and rashes to cuts and burns. As a bonus, it contains a bittering agent to help discourage licking. It’s available as both an ointment (great for targeted spots) and a spray gel (great for larger areas).
The Cone of Shame & Beyond: How to Keep Your Dog From Licking
You’ve done everything right—the wound is clean and treated. Now comes the 24/7 job of preventing your dog from undoing all your hard work with a few licks. This is a crucial part of successful dog wound care. Here’s your menu of options.
The Gold Standard: The E-Collar
We often call it the “cone of shame.” Vets suggest using the Elizabethan collar. It stops dogs from reaching their wounds. A properly fitted cone that extends just beyond your dog’s nose is a nearly foolproof barrier.
The Comfy Alternatives (Use with Caution)
- Inflatable or Soft Collars: They resemble travel pillows. They are more comfortable sleeping and moving through doorways. However, be warned: a flexible or determined dog (especially one with a long snout) can often find a way to bend around them to reach a wound. They are best for dogs with mellow personalities or for wounds on the upper body.
- Recovery Suits or T-Shirts: These are excellent for covering wounds on the torso, chest, or abdomen. You can buy a professional recovery suit or simply use a human t-shirt or a baby onesie, depending on your dog’s size. Just make sure the fit is snug but not restrictive, and change it immediately if it gets damp.
The Situational Tools
- Anti-Lick Sprays (Bitter Apple): These sprays have a foul taste designed to deter licking. They can be a helpful secondary tool, but they are not a primary solution. Some dogs seem to completely ignore the taste or even like it! It’s a bit of a gamble.
- Bandages and Boots: Bandages or dog booties can protect paws and legs. Just remember to follow the safety rules for bandaging we talked about earlier.
The Secret Weapon: Distraction!
Never underestimate the power of redirecting your dog’s brain. When you see them start to focus on their wound, engage them in a different activity. A food puzzle, a frozen Kong, a calm training session for a new trick, or a short, gentle walk (if the wound allows) can help distract them from the itch.
Conclusion: You’ve Got This!
That initial moment of panic when you see your dog is hurt is terrifying, but it doesn’t have to leave you feeling helpless. A prepared and confident pet parent knows how to spot a minor issue versus a real emergency that needs a vet’s help.
Remember the key takeaways: always assess for red flags first.
For minor wounds, you should:
- Clean them gently and properly.
- Use the right tools.
- Apply safe and effective treatment.
- Most importantly, prevent licking at all costs.
By building a first-aid kit and understanding the products on the shelf, you’ve already won half the battle. You have a plan. You know the essentials of dog wound care. You can stay calm and act quickly when your furry friend needs help. Your dog is incredibly lucky to have you.
Frequently Asked Questions
You should see a vet immediately for heavy or unstoppable bleeding, deep wounds where you can see underlying tissue, any puncture or animal bite wound, or any burns. Also, go to the vet for signs of infection (redness, swelling, heat, pus, bad smell), embedded objects, eye injuries, or if the dog is in extreme pain.
No, you should not use hydrogen peroxide or rubbing alcohol as they damage healthy, healing cells. While some people use Neosporin, it's safer to use a pet-specific antibiotic ointment because some dogs can have an allergic reaction to an ingredient in Neosporin.
The most reliable method is an Elizabethan collar (E-collar), also known as "the cone." Other effective options include inflatable collars for more comfort, recovery suits or t-shirts for body wounds, and consistently distracting your dog with toys or puzzles when they focus on the wound.
There are two key checks. First, use the "Two-Finger Rule": you should be able to comfortably slide two fingers under the top edge of the bandage. Second, if you've left the two middle toes exposed, check them periodically. If the toes look swollen, feel cold, or are spreading apart, the bandage is too tight and must be removed immediately.
A wound spray with Hypochlorous Acid (HOCl), like Vetericyn, is a top choice. It's a powerful and gentle antimicrobial that cleans wounds effectively without stinging or damaging healthy tissue, and it's safe if licked. Products combining Manuka Honey and MicroSilver, like Silver Honey, are also excellent for their antibacterial and healing properties.
